
When I first purchased my air rifle I was excited to get out in the yard and do some target practice. However, I ran into a problem. I needed a way to stop the pellets from flying all over the place. Mainly, I wanted to stop the pellets from going into my neighbor’s yard.
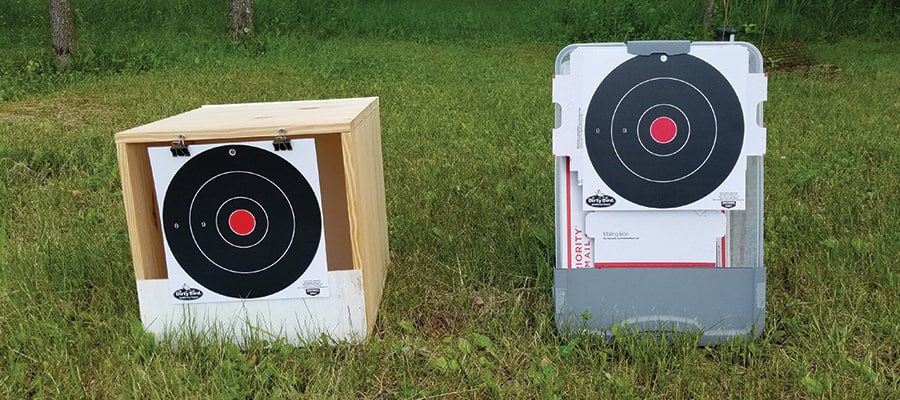
Doing a little research I saw a pellet trap is my best option to stop pellets from leaving my yard, but did I have to buy an expensive one? No. I’m a DIY kind of guy, and I found a solution that helped me and it will help you as well. I built a pellet trap for myself and I’m going to show you how you can build one too. In a mere 10 minutes and for under $10 you can have yourself a target stand and a pellet trap in one.
You’re lucky because I’m the type of guy that experiments with things. In this article, I’m not just going to show you my cheaper $10 dollar creating. I built two pellet traps and I’m going to show you how to make both. One that will cost you less than $10 and one that will cost around $50. Both pellet traps can be built in under 30 minutes if you have even moderate handyman skills.
You will need access to power tools for this project. Also, if you have scrap plywood around your property I recommend using it, it will save you some money and put something to use that has been taking up space.
The quick and easy pellet trap
The inspiration for the first cheap trap was simple. I needed a quick option for a pellet trap because I am forgetful. Does this scenario sound familiar to you? I packed up my car to head to my friend’s house, 85 miles away to get some target practice done with my .22 cal Benjamin Trail air rifle. I’m trucking along, I’ve got my audiobook going, and all of a sudden it hits me. Ah, crap. I forgot my heavy duty trap at home. (The one I’m going to show you later).
I was too far to turn around, but I still had most of the 85 miles of driving left to go shooting. Well, my mind started going and I thought there has to be a way to make a pellet trap quickly and for not a lot of money. I already have an overactive imagination. I know my fellow DIYers out there do too. Thanks to ample time to think and the fact that it’s not hard to find a Wal-Mart, even in the middle of nowhere I figured something out. Wal-Marts really are everywhere, but you dont’ have to pick up your supplies there. Most general stores will do.
Anyway, I came up with a plan to build a pellet trap for less than $10, and it only took me 10 minutes to assemble. That’s right, assemble, not build. This one is easy.
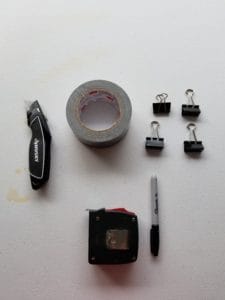
What you will need
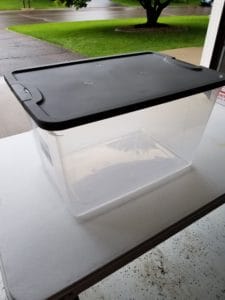
- 64-quart latching tote or similar (squared edges works best)
- Scrap 2×4’s or wood panels
- Razor knife or scissors
- Duct tape and tape measure, if available
- Binder clips, just in case
Step by step instructions
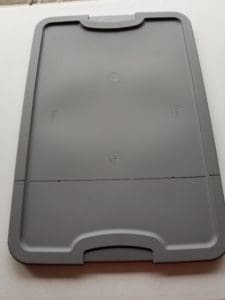
- Remove the lid from the tote. You did remember to get the lid at Wal-Mart, right? If you didn’t, we could improvise.
- Next, measure six inches from one of the latches on the lid and draw a line as shown in the picture below. If you don’t have a tape measure to use. The height of a soda or beer can will do just fine.
- Go ahead and cut along that line. It’s the six-inch portion we are after.
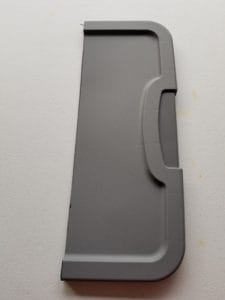
- With that done take the six-inch portion and clip the lid back on to the tote on as you see in the picture. If you have a roll of duct tape available, I recommend using two small pieces to secure the cover. The tape is not required, but it will help keep the lid in place. As a self-respecting DIYer, I love my duct tape.
NOTE: The purpose of the lid is to help keep the pellets in the bottom of the trap when I’m packing up at the end of the day.
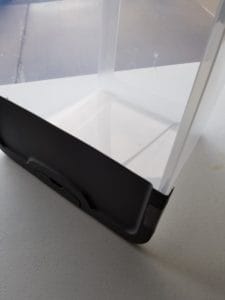
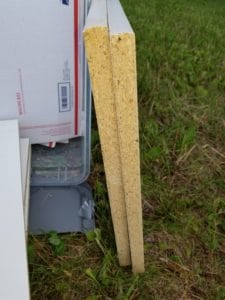
- Now, I don’t know the exact tote you got so measurements will vary here, but you’ll need to fit your scrap wood inside the tote. to line the back and provide a brake for your pellets. The wood will act as a way to slow down and stop the pellet so we can trap it. This is where I did a good amount of experimenting.
Before you ask, I did try cardboard and the pellets will cut right through it. I used some pretty high-density cardboard too. It’s just not good enough. Now, you can do some pretty cool stuff with plumber’s putty. Some people use plumber’s putty and line the back of the box. Other people have covered that, and that’s not what I’m doing here. That method just isn’t for me. It is way too messy and you need a ton of putty.
I found that 1.5 inches of wood will stop a .22 caliber pellet at a speed around 1000 FPS. You can see in the picture that I used particle board that my buddy had laying around. Luckily, even if you don’t have scrap wood like this around your place, it’s really not that expensive.
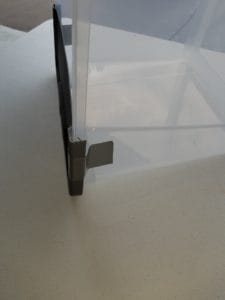
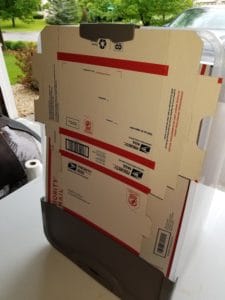
- Earlier I said cardboard won’t stop your pellet. If you were disappointed because you have lots of cardboard laying around, this step is for you. Take a flat piece of cardboard and place it under the top latch of the tote. This step is where you can hang your target when you start shooting.
- If you forgot your targets, you could draw pictures of squirrels or whatever on the cardboard. You won’t see any squirrel drawings from me in this tutorial though, that’s up to you to figure out. I’m not sure you would recognize anything I drew as a squirrel anyway.
That’s it. It’s that simple. This trap will get the job done in a pinch or if you just don’t want to buy a more expensive trap.
What’s next?
The heavy-duty pellet trap
Depending on if you have to purchase the wood for this project or if you have scrap sheets of plywood laying around the cost will vary, but you can expect to spend approximately $50.
What you will need:
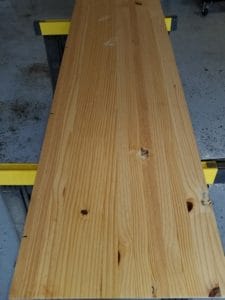
1 – Edge glued panel 18×72 inches, basically pine shelving
1 – 2×4 foot sheet of hardboard
4 – 2×4’s, 16 inches long or a 16×16 pieces of 3/4 inch thick wood panels
2-4 – Binder clips
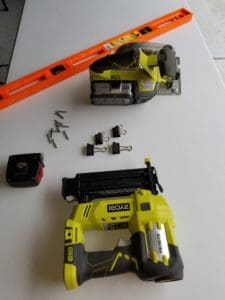
10 – drywall screws (1 inch)
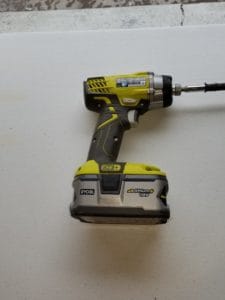
Screwdriver or impact driver
Circular saw
Tape measure
Straight edge
Appropriate safety gear, safety glasses, etc
Brad Nailer (optional)
Saw horses (optional)
Table or workbench (optional)
Let’s get started building your pellet trap
First, measure the thickness of your wood panel. Now it’s time for some math, but don’t get scared, it’s easy math. Double your measurement and add 16.
Thickness + Thickness + 16 = ?
For the box I built, I measured the thickness at 3/4 inch or .75.
So it would be:
.75 + .75 + 16 = 17.5 inches
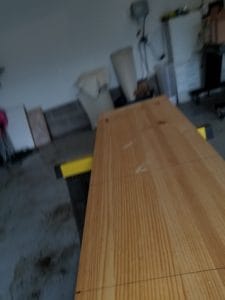
Next, take your wood panel and measure 17.5 inches and make a mark. As long as your tape measure will go the distance. Make another mark at 35 inches, one at 51 inches, and finally one at 67 inches. If it won’t that’s OK, I’m sure you can figure out how to make do, but you need to mark those locations.
If you are using a square as a straight edge, mark straight lines across the panel at the above measurements. For those of you using a ruler, it is best to make marks at the top and bottom of the panel to help with creating a straight line.
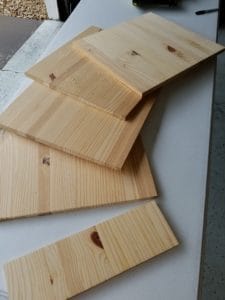
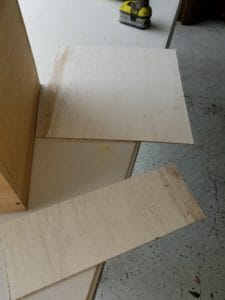
STOP! Before you go any further check your marks. We are about to cut at each point, and when we are done you are going to end up with two pieces 17.5 inches wide and two boards 16 inches wide. You’ll notice you have an extra 6 inch piece left over. We’ll talk about that later. Is that what you have marked? Good, now cut your panels.
The next step will be easier if you have a brad nailer, but it is not required.
Assemble your box. Place one of the 16 inch wide pieces on a flat surface and then place one of the 17.5 inch wide pieces to the right of the piece on the flat surface, creating a 90-degree angle or perpendicular. Nail or screw the pieces together. Use at least two screws or nails per side for a total of eight.
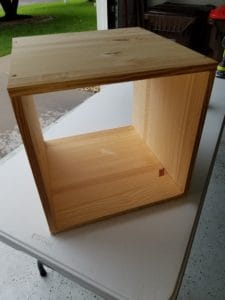
Now do that for the other side. Place the second 16-inch wide piece on the flat surface to finish assembly.
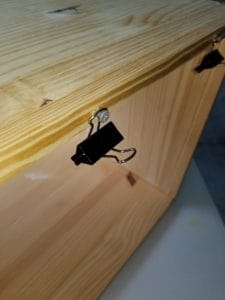
There should be about a 6-inch piece of wood panel left over. You can attach that piece of wood to the front of the box as shown in the image. This will be the front of your trap.
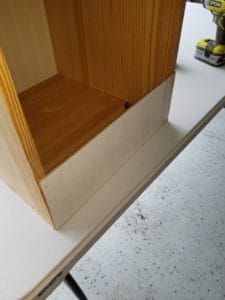
Next, you will need to cut a piece of hardboard 17.5×17.5 inches. and attached it to the back of the box on the opposite side from the short piece on the front. If you looked through the 10 dollar build earlier this should be looking familiar.
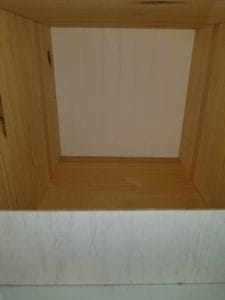
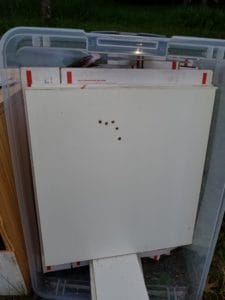
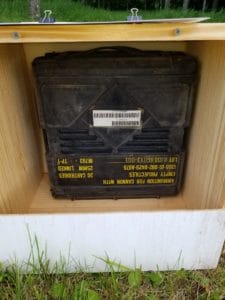
By now you should have a box that has an inside dimension of 16×16. Take your 16 inch 2×4’s and place them in the back of the box. You will see in the below photo that I improvised with an ammo can I picked up back in my Army days. It worked like a charm. I do realize not everyone will have access to an ammo can for 25mm rounds off a Bradley Fighting Vehicle. You can also use particle board or plywood for the back. Make sure to use at least 1.5 inches to adequately stop the pellets.
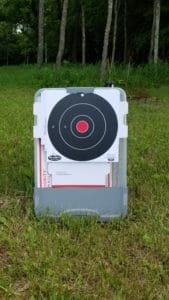
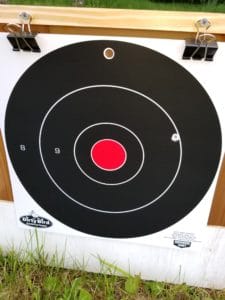
Finally, you should have two remaining screws. Measure in 5 inches from either side and screw in the last two screws. Don’t screw them in all the way; they will be used to hang our target with the binder clips.
Now, hang your target in place and put your pellet trap at your favorite shooting distance and have fun.
If you’ve done any DIY stuff before this project shouldn’t really take you too long. If you haven’t, it’s a good introduction for you. This works great for me, and I hope it works well for you.
Trust but Verify
Once you’re done with your DIY traps take a few shots and then verify they are working as intended. You should really do that even with storebought traps. Every airgun is different, and your supplies could be different as well. While this works great for me, I wouldn’t want you to plug away assuming it’s working and find out something was different and now you have pellet holes in your shed or something.
Also, before you go shooting in your backyard, make sure it’s legal. We made an article about some of the legal stuff you can check out, or you can just go look up your city ordinances.
Is DIY For You?
DIY pellet traps aren’t for everyone. If these projects just didn’t do it for you, that’s fine. Dana, the other writer for Airgun Planet is only kind of a handy guy. He can get things done, but you’ll find him buying something over making it most of the time. That’s great for you because we’re going to be making an article covering what we think the best store bought pellet traps are.
Even if you made the DIY options you might be interested in some of the store-bought ones, so be sure to come back to Airgun planet to check it out.